When water damage strikes, it’s vital to act swiftly and methodically. Start by evaluating the situation to ensure safety and identify the source of the water. Shutting off utilities is essential to prevent hazards, while documenting the damage with photos can help your insurance claim later. Once you’ve done that, you’ll need to tackle the standing water before it leads to more serious issues. The next steps are important, and knowing them can make a significant difference.
Key Takeaways
- Assess the situation by identifying the water source and documenting damage with photos for insurance claims.
- Shut off utilities by locating the main shutoff valve and turning off electricity to prevent hazards.
- Remove standing water swiftly using powerful extraction devices and ensure safety with appropriate gear.
- Check for mold growth by inspecting affected areas and taking necessary remediation steps if mold is present.
- Contact your insurance provider to report damage, document the incident, and understand your coverage options.
Assess the Situation
When you discover water damage, the first step is to assess the situation promptly to minimize further harm.
Start by identifying the water source—whether it’s a burst pipe, an overflowing toilet, or roof leaks. Understanding where the water’s coming from helps you tackle the root cause effectively.
Next, perform a damage assessment; check for affected areas, including walls, flooring, and any personal belongings. Pay close attention to the extent of the damage; mold can develop quickly, so time is of the essence.
Document everything with photos, as this can be vital for insurance claims. If you’re unsure about the severity, don’t hesitate to consult a professional to ensure a thorough evaluation.
Ensure Safety
After evaluating the situation, your next priority is to secure safety for everyone involved.
Begin by implementing safety protocols you may already have in place. Ascertain that everyone is accounted for and remove any hazards that could cause injuries, such as slippery surfaces or exposed electrical wiring. If the water damage is extensive, it’s vital to evacuate the area to prevent accidents.
Next, gather your emergency contacts. This includes local authorities, fire departments, and water damage restoration specialists.
Keeping these numbers handy allows you to act quickly if the situation worsens. Communicate openly with those affected, letting them know the steps you’re taking to ensure their safety.
Shut Off Utilities
After ensuring your safety, your next step is to shut off utilities to prevent further damage.
Locate the main shutoff valve for your water supply and turn it off immediately.
Additionally, be sure to turn off the electricity at the main breaker to safeguard against electrical hazards.
Locate Main Shutoff Valve
One of the first steps to take in the event of water damage is to locate your main shutoff valve. This valve controls the flow of water into your home, and knowing its location is essential for preventing further damage.
Typically, you’ll find the main water valve in the basement, crawl space, or near the foundation wall. It’s often a round or lever-type valve.
Once you’ve identified the valve location, make sure you can access it quickly in emergencies. You might want to label it clearly for future reference.
Turn Off Electricity
Once you’ve shut off the main water supply, the next crucial step is to turn off the electricity to prevent electrical hazards.
Head to your circuit breaker and switch off the main power supply. This ensures electrical safety during the cleanup process, minimizing the risk of shock or fire.
If you’re uncertain about doing this safely, don’t hesitate to call a professional. Remember, a power outage might be necessary for your safety, but it’s a small price to pay to protect yourself and your home.
Once the area is dry and safe, you can restore power. Your well-being is essential, and taking these steps demonstrates your commitment to maintaining a secure environment for yourself and your loved ones.
Document the Damage
While dealing with the aftermath of water damage, documenting the extent of the destruction is essential for effective recovery. By using proper documenting techniques, you’ll create a clear damage assessment that’s invaluable for insurance claims and restoration efforts.
Start by taking detailed photos and videos of all affected areas.
Capture:
- Water-soaked furniture and belongings
- Walls and ceilings with visible damage
- Flooring that’s warped or stained
- Any structural issues, like sagging beams
Make sure to include timestamps and notes on each image, describing the severity of the damage.
This thorough documentation helps in filing claims and allows restoration professionals to understand the situation better. By being diligent in your documentation, you’re taking a significant step toward reclaiming your space and ensuring that you have the support you need during this challenging time.
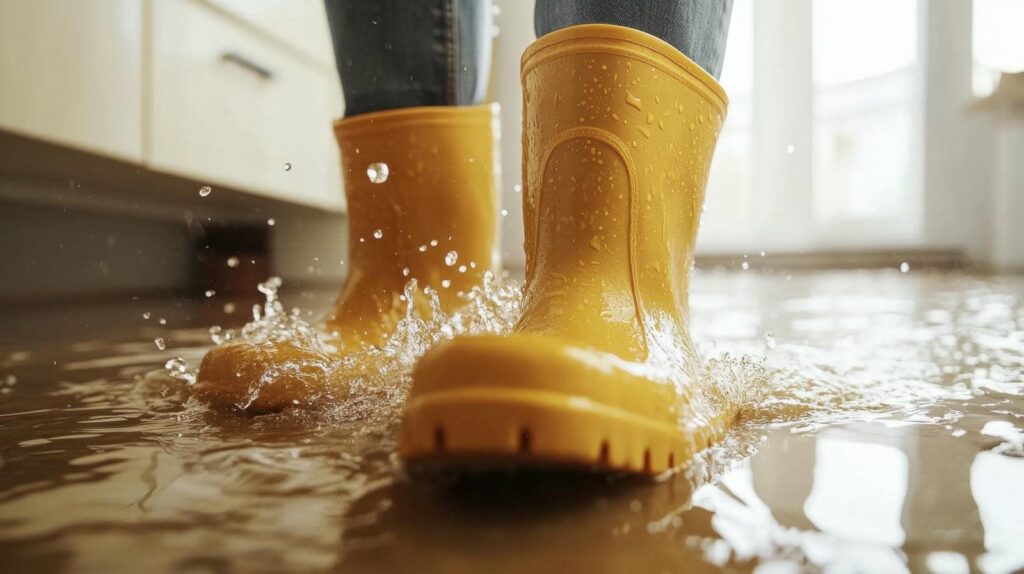
Remove Standing Water
Once you’ve documented the damage, it’s essential to assess the water levels in the affected area.
Use the appropriate equipment, like pumps and wet vacuums, to efficiently remove standing water while ensuring your safety with gear such as gloves and rubber boots.
Taking these steps promptly can greatly reduce further damage and the risk of mold growth.
Assess Water Levels
After a water damage incident, the first step is to assess water levels and promptly remove any standing water to prevent further damage.
Use water level indicators to determine the extent of flooding for a thorough flood damage assessment.
Here are some key actions to take:
Identify areas with high water accumulation.
Check for hidden pockets of water that could remain unnoticed.
Evaluate the impact on flooring, walls, and belongings.
Document the water levels for insurance claims and future reference.
Use Proper Equipment
With water levels assessed and documented, the next step is to use proper equipment to remove standing water efficiently.
Begin with a powerful water extraction device, which is crucial for swift and thorough removal. These machines can handle significant volumes, minimizing the risk of mold growth and further damage.
As you extract water, employ moisture meters to track humidity levels in the affected areas. This ensures you’re removing visible water and addressing hidden moisture that could lead to future issues.
Remember, effective equipment is essential to safeguarding your space and restoring it to a safe, healthy environment.
Taking these steps together fosters a sense of community and support in recovery efforts.
Ensure Safety Measures
While you work to remove standing water, prioritizing safety is essential to protect yourself and others in the environment. Equip yourself with the right safety gear to minimize risks.
Here are some key items to reflect on:
- Waterproof boots to keep your feet dry
- Heavy-duty gloves to protect your hands from contaminants
- A mask to filter out harmful mold spores
- Goggles to shield your eyes from debris
Additionally, make sure you have your emergency contacts readily available.
Keep the numbers of local restoration services and health professionals on hand, just in case.
Dry Affected Areas
To effectively mitigate the damage caused by water, you must prioritize drying the affected areas as soon as possible.
Start by evaluating the extent of the moisture and identifying all impacted spaces. Utilize efficient drying techniques such as fans, dehumidifiers, and open windows to enhance airflow. Aim for a consistent temperature to accelerate moisture removal.
For carpets and upholstery, make sure you lift them to promote thorough drying underneath. If items are heavily saturated, consider removing them from the premises to prevent mold growth.
Keep in mind that maintaining a dry environment is vital; monitor humidity levels regularly to avoid lingering moisture.
If you encounter difficult areas, like behind walls or within insulation, professional assistance may be necessary.
Clean and Sanitize
After addressing the drying process, it’s crucial to clean and sanitize the affected areas to eliminate harmful contaminants and prevent further issues.
Effective cleaning techniques and sanitization methods help ensure your space is safe and healthy. Here’s how you can proceed:
Use a mixture of soap and water to scrub surfaces, removing dirt and grime.
Apply disinfectants to high-touch areas like doorknobs, light switches, and countertops.
Utilize a steam cleaner for carpets and upholstery, ensuring deep cleaning without harsh chemicals.
Wipe down hard surfaces with a sanitizing solution to kill lingering bacteria and viruses.
Check for Mold Growth
After addressing the immediate cleanup, you need to check for mold growth in your home.
Start by identifying areas that were affected by water, looking for signs like discoloration or a musty smell.
Once you’ve pinpointed these spots, assess the severity of the mold to determine the best course of action for remediation.
Identify Affected Areas
When dealing with water damage, checking for mold growth is essential—just a few days of moisture can lead to significant mold issues.
Start your moisture assessment by identifying affected areas in your home. Here’s what to look for:
- Dark spots on walls or ceilings
- A musty odor lingering in the air
- Peeling paint or wallpaper
- Dampness in hidden corners, like behind appliances
Using water detection methods, you can pinpoint areas where moisture is trapped.
Don’t forget to check basements and crawl spaces, as they’re often overlooked.
By taking these steps, you’ll protect your home and create a healthier environment for everyone.
Assess Mold Severity
Identifying moisture in your home is just the first step; now it’s time to assess the severity of any mold growth.
Start by inspecting damp areas, paying close attention to corners, ceilings, and hidden spaces like behind furniture. Look for discoloration, a musty smell, or visible patches of mold.
If you find mold, determine its extent. Small patches might be manageable with DIY mold removal, but larger infestations often require professional help.
Remember, mold can spread quickly, so act fast.
Consider implementing mold prevention strategies, such as controlling humidity and ensuring proper ventilation, to safeguard your home.
Repair and Restore
Once you’ve assessed the extent of the water damage, it’s crucial to begin the repair and restoration process promptly to prevent further complications.
Utilize effective repair techniques and follow restoration tips to restore your home to its former glory.
Consider these key steps:
Remove damaged materials: Take out soaked drywall, insulation, or flooring to prevent mold growth.
Dry out the area: Use fans and dehumidifiers to eliminate moisture from the affected spaces.
Clean and disinfect: Confirm surfaces are sanitized to eliminate any harmful bacteria or contaminants.
Repair structural components: Patch up walls, replace flooring, and restore any damaged fixtures to bring back your home’s integrity.
Contact Insurance Provider
How can you ensure that your financial losses from water damage are minimized? The first step is to contact your insurance provider promptly. They’ll guide you through the process of filing insurance claims, ensuring you understand your coverage options.
Take note of your policy details and any limits on coverage for water damage; this knowledge is crucial for maximizing your claim.
When you reach out, document the damage with photos and notes to support your case. Your agent will help you navigate the claims process, explaining what’s covered and what isn’t.
It’s important to ask questions and clarify any uncertainties, ensuring you’re not left in the dark about your entitlements.
Frequently Asked Questions
How Long Does It Take for Water Damage to Appear?
Water damage typically appears within minutes to hours after exposure. You’ll notice initial signs like discoloration, warping, or a musty smell. Understanding the water damage timeline helps you act quickly to minimize further issues.
Can I Use My Home Appliances After Water Damage?
Sure, go ahead and plug in that wet toaster—what could possibly go wrong? Seriously though, prioritize appliance safety; check for electrical hazards before using anything. Better safe than sorry, right? Your home deserves it!
What Is the Average Cost of Water Damage Restoration?
The average water damage restoration costs between $1,500 and $3,500, depending on severity. You’ll want to assess the damage thoroughly and consult professionals to ensure effective restoration and prevent further issues in your home.
How Can I Prevent Future Water Damage?
Think of your home as a fortress; you’ve gotta fortify it! Implement preventive measures like regular maintenance on pipes and gutters. This proactive approach will shield your sanctuary from future water damage and keep it cozy.
Should I Hire a Professional for Water Damage Cleanup?
Yes, you should hire professional services for water damage cleanup. They’ve got the expertise and tools to effectively remove moisture, prevent mold growth, and restore your space, ensuring a safe and healthy environment for you.
Review
Promptly addressing water damage is essential to minimizing its impact. By following the outlined steps—ensuring safety, documenting damage, and contacting your insurance provider—you can effectively navigate this stressful situation. Remember, swift action protects your property and helps prevent costly repairs down the line. Stay proactive, and you’ll safeguard your home from further issues.