When you face water damage, it’s essential to act quickly and methodically. Start by evaluating the extent of the damage and ensuring your safety from potential electrical hazards. You’ll need to stop the source of water, remove standing water, and begin the drying process. Each step is critical in preventing further issues, but knowing how to tackle the cleanup effectively can make all the difference in restoring your space. What comes next is just as important.
Key Takeaways
- Identify and stop the water source to prevent further damage before beginning cleanup efforts.
- Wear protective gear and ensure electrical safety by turning off power.
- Remove standing water promptly using pumps or wet vacuums to minimize mold growth.
- Dry the area thoroughly with fans and dehumidifiers, monitoring for residual moisture.
- Assess and repair damaged structures, replacing severely affected materials as needed.
Assess the Water Damage
Before you jump into the cleanup process, it’s crucial to assess the extent of the water damage. Start by identifying the water source, whether it’s a burst pipe, flooding, or a roof leak. Knowing where the water came from helps you understand its potential impact on your property.
Next, conduct a detailed damage assessment. Check for visible signs like discoloration, warping, or mold growth, which indicate how deeply the water has penetrated materials. Use a moisture meter to gauge humidity levels in walls and floors—this step can reveal hidden damage.
Document your findings with photos and notes; this information is invaluable for insurance claims and future reference. Remember, a thorough assessment guides your cleanup efforts and connects you with the broader community of homeowners who’ve faced similar challenges.
Taking these steps ensures you’re well-informed and prepared for the next stages of recovery.
Ensure Safety Precautions
Before you begin any water damage cleanup, verify you assess for electrical hazards to prevent potential shocks.
Wearing protective gear, including gloves and masks, is vital to safeguard against contaminants and mold exposure.
Finally, ventilate affected areas to reduce moisture and improve air quality, promoting a safer environment as you work.
Assess Electrical Hazards
When dealing with water damage cleanup, evaluating electrical hazards is crucial to ensure your safety and that of others.
Start with a thorough electrical inspection to identify any compromised wiring or outlets. If you notice frayed wires, exposed circuits, or waterlogged electrical equipment, refrain from using them.
Conduct hazard identification by checking for signs of short circuits, such as flickering lights or tripped breakers. If you’re unsure, it’s best to consult a licensed electrician to assess the situation.
Remember, water and electricity don’t mix; even a small amount of moisture can create dangerous conditions. Always prioritize safety by turning off power at the main breaker before beginning any cleanup efforts.
Your awareness can prevent potential accidents and promote everyone’s well-being.
Use Protective Gear
Using protective gear is essential during water damage cleanup, especially since exposure to contaminated water and hazardous materials can pose significant health risks.
You should wear protective clothing, including gloves and long sleeves, to shield your skin from harmful substances. Waterproof boots are also vital to prevent slip hazards and protect your feet from contaminated water.
Don’t forget to wear safety goggles to shield your eyes from splashes and debris. A mask can also help protect your lungs from mold spores and other airborne contaminants.
By equipping yourself with the right gear, you ensure your safety and enhance your efficiency in the cleanup process.
Ventilate Affected Areas
To ensure a safe and effective water damage cleanup, it’s crucial to ventilate affected areas promptly.
Start by opening windows and doors to enhance air circulation, allowing fresh air to replace stale, humid air. If possible, use fans or dehumidifiers to accelerate moisture control, as stagnant air can contribute to mold growth and structural damage.
Verify that any electrical equipment you use is safe and properly rated for the environment. Monitor humidity levels with a hygrometer, aiming to keep them below 60%.
By maintaining good air circulation and controlling moisture, you’ll not only create a healthier environment but also foster a sense of belonging for everyone involved in the cleanup process.
Prioritize safety, and your efforts will pay off.
Stop the Water Source
To effectively stop water damage, you must first identify the source of the leak, whether it’s a broken pipe or an overflowing appliance.
Once you pinpoint the issue, shut off the water supply to prevent further flooding.
After that, assess the surrounding area for any additional hazards or damage that might require immediate attention.
Identify the Leak
How can you effectively stop further water damage? Start by conducting thorough leak detection to identify the source of moisture.
Look for visible signs like water stains, dampness, or mold growth. Use moisture mapping techniques, which involve measuring humidity levels throughout your home, to pinpoint hidden leaks that may not be immediately apparent.
Pay special attention to areas around plumbing fixtures, appliances, and basements, where leaks often occur. If you find a leak, document its location and severity to help prioritize repairs.
Shut Off Supply
When you’ve identified the source of a leak, immediately shutting off the water supply is essential to preventing further damage.
Follow these steps to ensure you take effective emergency measures:
- Locate the main shut-off valve, typically found near the water meter.
- If the leak is from an appliance, find the specific shut-off valves for that unit.
- Turn the valves clockwise until they’re fully closed; you should feel resistance.
- Check for any additional shut-off valves in your home, like those for sinks or toilets.
Assess Surrounding Area
As you assess the surrounding area, it’s vital to identify any additional sources of water that may exacerbate the situation. Start by checking for leaks in pipes, appliances, or roofs. Once you’ve located the source, make sure it’s stopped to prevent further damage.
Next, initiate furniture removal to safeguard your belongings from moisture exposure. Document any damage thoroughly; this will be significant for insurance claims. Take photos and note the extent of the damage, including affected materials and areas, to create a thorough damage documentation report.
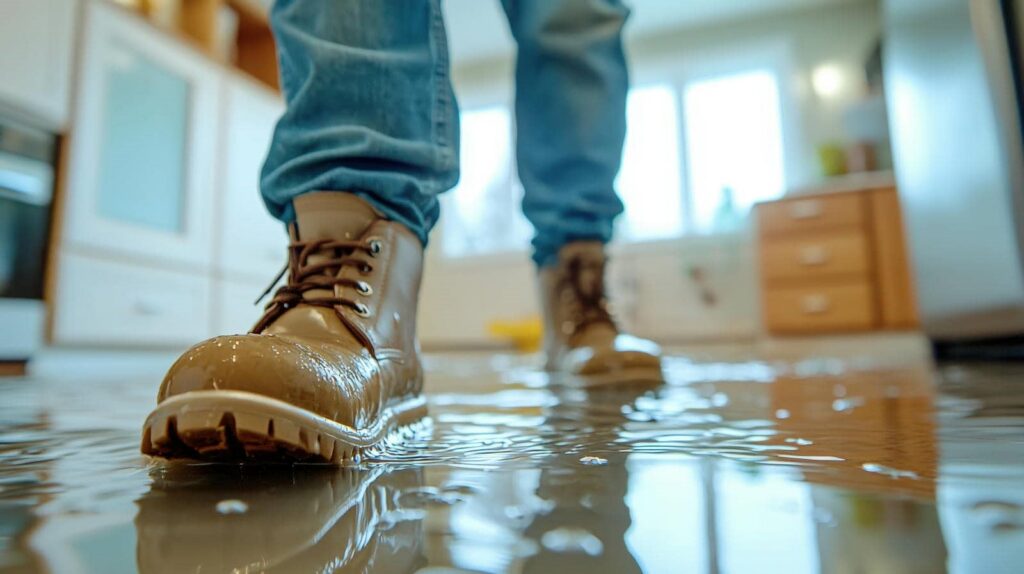
Remove Standing Water
To effectively mitigate water damage, it’s crucial to remove standing water as soon as possible. Standing water can lead to mold growth and structural damage, so quick action is imperative.
Here’s how you can efficiently carry out water extraction:
Identify the Source: Determine where the water is coming from to stop further damage.
Gather Equipment: Use pumps, wet vacuums, and buckets for water extraction, depending on the volume.
Start Extraction: Begin removing standing water by using your chosen equipment. Confirm you cover all affected areas.
Dispose of Water Safely: Dispose of the extracted water according to local regulations to prevent contamination.
Dry and Dehumidify the Area
Drying and dehumidifying the area is essential to prevent further damage and mold growth after water extraction.
Start by employing effective drying techniques, such as using fans to increase airflow and accelerate evaporation. Position fans strategically to create cross-ventilation, targeting damp areas specifically.
Next, consider your dehumidifier options. A portable dehumidifier can work wonders in smaller spaces, while larger, industrial-grade models are ideal for extensive water damage. Set the dehumidifier to the appropriate level, generally around 30-60% humidity, to efficiently pull moisture from the air.
Don’t forget to monitor the area regularly. Check surfaces for residual moisture and verify that your drying efforts are effective.
Clean and Disinfect Affected Surfaces
Cleaning and disinfecting affected surfaces is essential in the aftermath of water damage to ensure the safety of your living space.
Proper techniques and effective cleaning agents can help eliminate harmful bacteria and mold. Follow these steps to confirm thorough cleaning:
Remove Debris: Clear away any materials that can trap moisture, such as carpets and rugs.
Choose Cleaning Agents: Select suitable cleaning agents like bleach or hydrogen peroxide, confirming they’re appropriate for the surfaces you’re treating.
Apply Disinfection Methods: Use a spray bottle to evenly distribute your cleaning solution on surfaces. Allow it to sit for at least 10 minutes to effectively kill germs.
Rinse and Dry: Wipe the area with a clean, damp cloth, then dry surfaces thoroughly to prevent future moisture issues.
Restore and Repair Damaged Structures
Restoring and repairing damaged structures after water intrusion is essential for maintaining the integrity of your home.
Begin by evaluating the extent of the damage, focusing on areas like walls, floors, and foundations. You’ll want to identify any structural issues, as compromised materials can lead to further problems if left unaddressed.
Utilize effective restoration techniques to prevent mold growth. Remove and replace any severely affected drywall or insulation, ensuring that new materials are properly installed to uphold structural integrity.
When it comes to flooring, consider options like moisture-resistant tiles or treated wood.
Don’t overlook the importance of professional evaluation and repairs for significant damage. Investing in expert services ensures that your home’s structure is sound and safe.
Frequently Asked Questions
How Long Does Water Damage Restoration Typically Take?
Water damage restoration typically takes 3 to 7 days. The restoration timeline depends on the severity of damage and the drying process’s efficiency, ensuring your space returns to normal as quickly as possible.
Can I Handle Water Damage Cleanup Myself?
You can handle water damage cleanup yourself, but tread carefully. DIY cleanup requires safety precautions like protective gear and proper drying techniques. If the damage’s extensive, consider calling professionals to avoid further issues down the line.
What Are the Signs of Hidden Water Damage?
You’ll notice signs of hidden water damage through mold growth, a musty smell, and discoloration on walls. These indicators can compromise your home’s structural integrity, so addressing them promptly is essential for maintaining a safe environment.
Will My Insurance Cover Water Damage Restoration Costs?
Your insurance policy might cover water damage restoration costs, but check your coverage limits first. Think of it like a safety net; if it’s frayed, you could fall short when you need it most.
How Can I Prevent Future Water Damage?
To prevent future water damage, implement effective drainage solutions like gutters and downspouts while applying waterproofing techniques to your foundation. Regularly inspect these systems to ensure efficient performance and protect your home from moisture.
Summary
In the aftermath of water damage, you’re not just mopping up a spill; you’re rebuilding your sanctuary. By following these essential steps, you can navigate the chaos with precision, ensuring your home returns to its former glory. Remember, safety comes first, and thorough documentation is key for insurance claims. Don’t hesitate to seek professional help if needed—sometimes, the foundation of your home requires expert hands to restore it to its rightful strength.